
The COCOA BUBBLES V 1.2
– Administrator Manual –
Last Update:
The Cocoa Bubbles
V 1.2
– Administrator Manual –
This is the Administrator documentation for The Cocoa Bubbles. It is an addition to the main Introduction Manual, and as such won’t repeat details already found there, but instead tries to cover all Admin functionalities specfically.
This manual is still a work in progress and will be updated with latest developments. If you have any questions, problems or feature requests, please contact Tom or Wolf.
(To quickly jump to a section you can use the headings on your left side index, or on mobile click the “Index” button on your top left)
– We hope you Enjoy THE COCOA BUBBLES APP! –
Administrator LOGIN
Administrators of Cocoa Bubbles can login to the app the same way as non admin members (by clicking the footer Logo shown here), and once logged in will then see all the functions and features permitted for Administrators only.
This includes Full Editing capabilities of each part and access to Create, Delete or Update any Tasks, Categories, Teams or Members, at any time from almost every page.
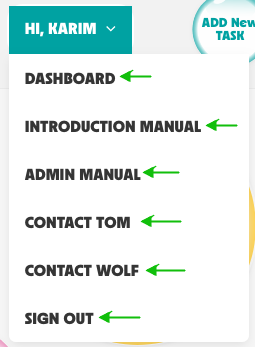
Once logged in, Administrators will see their Name in the header top right, and a dropdown menu below will reveal the Administrator Menu.
The Adminsitrator Menu contains shortcuts to:
- The DASHBOARD
- Introduction Manual
- Administrator Manual (this document)
- IT Support Contacts, Tom and Wolf
- Sign Out option
The DASHBOARD
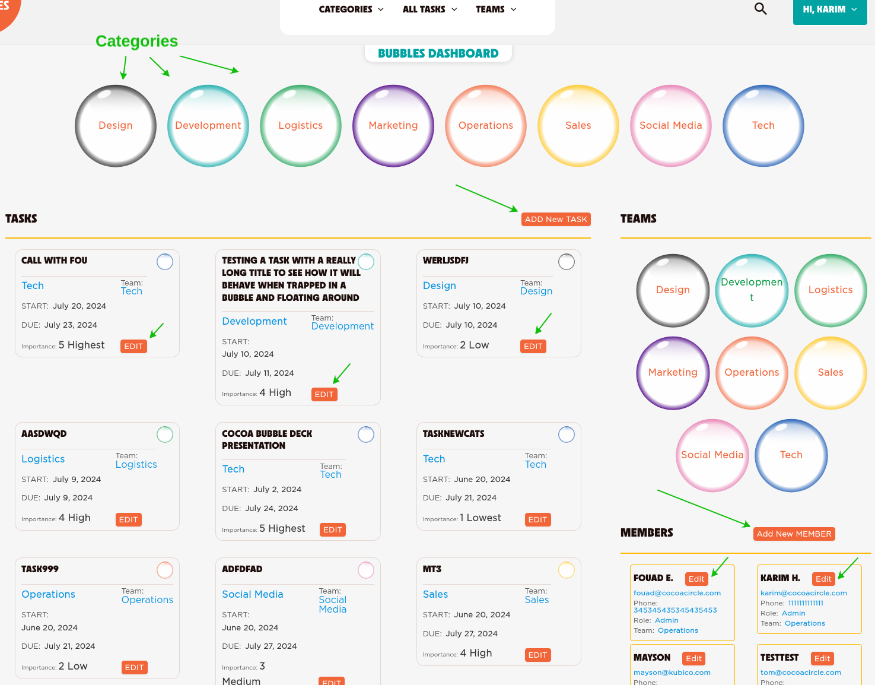
The Dashboard presents to Administrators an all-in-one overview of everything, and it allows Administrators to access and manage all main functions of Cocoa Bubbles, without leaving the page.
It enables Administrators to quickly access all Categories, all Teams, all Members and all the Latest Tasks, in one place.
Right below the Categories you will see the “ADD New TASK” button, which enables you to Create New Tasks, without leaving the page.
Further below on the right side Members Section there is the “ADD New MEMBER” button, which lets you add new members, without leaving the page.
The Latest Tasks section shows the essential details of each task, and an “EDIT” button enables you to update each task, also without leaving the page.
Existing Members Information can also be edited/updated right on the spot.
New Categories and New Teams are created right within the Task’s Editing, or the Member’s Editing interface, where they also can be assigned. (see details about “Adding New Task“ below)
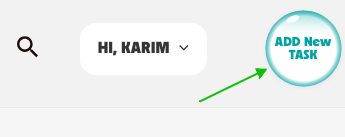
The ADD New TASK Button
For Administrators there is an “ADD New TASK” button on the top right of every page, which enables Administrators to quickly Add a new Task at any time, from any page.
ADDING a NEW TASK
When you click the ADD New TASK Button a popup appears which enables you to enter all the New Task Information.
In the first section you can enter the Title (required) and the Description, as well as an optional related Web Link (please enter the Full URL starting with https:// )
Additional Task supporting Attachments (such as Images, PDFs, Docs and other types), can be added to the Task, by clicking any of the Add File buttons.
In the next section you can associate the Task to a specific Category, and if a category does not exist yet, you can click the Add New CATEGORY button below to add a new category right there. The new Category is instantly available to be assigned to the Task.
Similarly, right beside it you can assign the Task to a specific Team, and it also lets you create a New Team just by clicking the Add New TEAM button. The new Team will also be instantly available to be assigned to the Task.
Following is the Date and Time Section, where you can enter the Task Start Date and Task Deadline Date. (additionally, not visible, every task also automatically records the date this task was “published” or “created”, which allows for additional options like sorting by “Newest” or “Oldest” tasks etc)
Below the date section you will find the Task Importance setting. Here is where you can set the Importance of a Task. This then enables additional visual dinstinctions of Task Bubbles, by changing their Dimensions (for example a higher Importance level shows a larger Bubble), as well as things like “sorting by Importance” etc.
In the bottom section you can set the Task Progress, which defaults to “In Progress” and can be changed to “Completed” anytime.
And the Task Status determines if this Task will be “Published” (active and visible to everyone), or “Draft” (only Admins can see and edit, to publish later), or by setting the status to “Trash” you can effectively delete this Task.

— To be continued …..